Tunic-Inspired Scavenger Hunt - The Finale
- Kelli Dunlap
- Mar 18, 2023
- 6 min read
Updated: Mar 18, 2023
The Tunic-Inspired scavenger hunt was a success! For some background, you can check out part 1 and part 2.
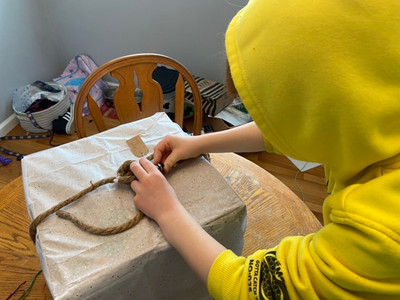
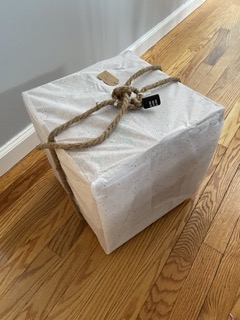
It all started with a perfectly normal box wrapped in sparkly paper, secured with a rope and locked with a combo lock on the table. There was a journal beside it and a green scabbard hanging from the chandelier. You know, a totally normal Friday afternoon.
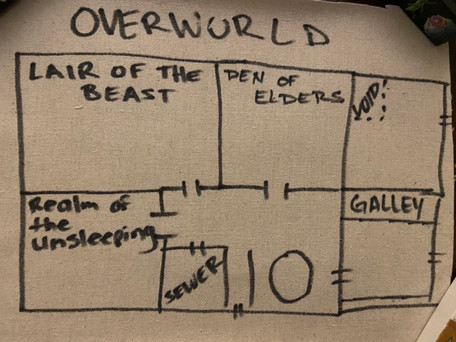
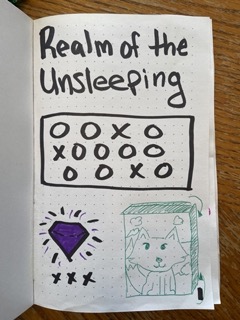
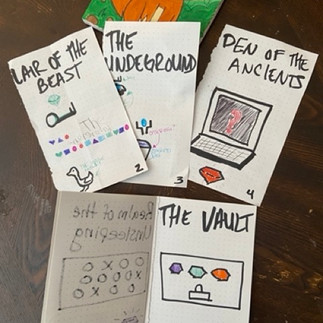
Upon further investigation, you find a map stashed inside the scabbard and in the journal are two pages: The Realm of the Unsleeping and The Vault. The observant adventurer will notice torn page edges in the notebook.
Referencing the map, you locate the Realm of the Unsleeping. This is what you find:
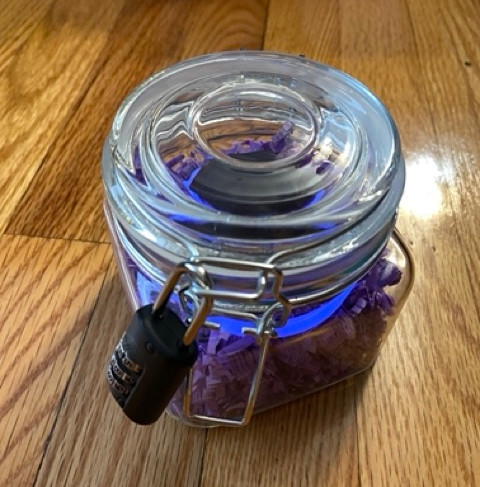
A glowing gem locked away in a jar
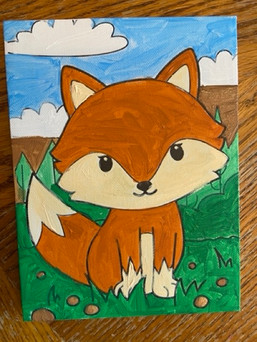
A fox painting hanging on the door
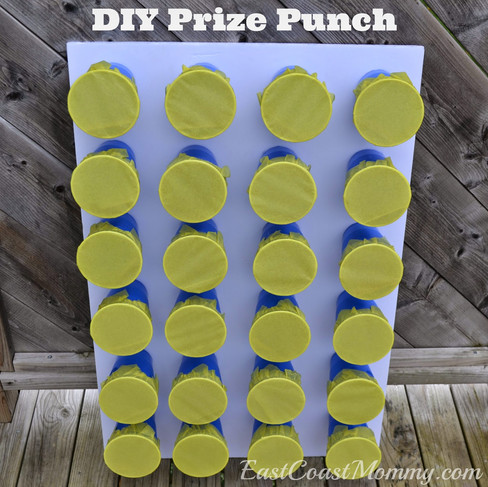
A mysterious wall with secret mini caverns (i.e. the prize punch. The actual one used was destroyed by my tiniest adventurer before I could get a picture).
So, referencing your journal, there are a few things that should look pretty similar.
First, the Xs and Os correspond to the layout of the mini caverns / prize punch. so you know which ones to punch. You explore (punch) the caverns indicated by Xs and discover 3 sacred relics. Three colors, 3 numbers, and 3 symbols.
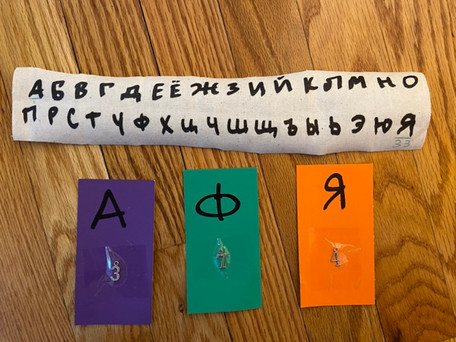
But how does it lead to the unlock code? You look behind the fox painting and discover another page of the journal and a scroll of ancient symbols.
Matching the symbols on the cards to the symbols on the scroll gives the numerical order to unlock the purple gem! But wait, there's more... the gem itself opens and inside is another number attached to a purple string.
Turning your attention to new information, you take a look at the journal piece you discovered behind the fox painting. It reads "Lair of the Beast" with a picture of a key, a green gem, multicolor shapes and a picture of a goose with "the goose knows" written next to it. Once you enter The Lair of the Beast, you see the green gem in glass case, it's opening mechanism tied with - as the label says - 'Magical Uncuttable Twine.' Next to the gem is a pair of scissors - labeled 'Magical Uncuttable Twine Cutters,' however the scissors are padlocked closed. You're gonna need a key.
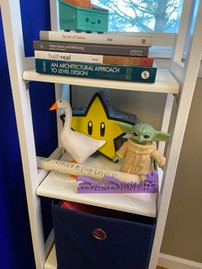
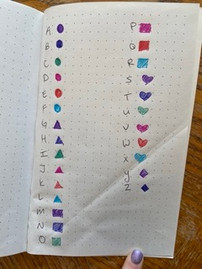
If you've explored the journal, then you found the letter - color - shape code in the very back. Alternatively, you might have also searched the Lair for The Goose who, apparently, knows. By the Goose is a rolled up map labeled The Underground. If you translated the letter - color - shape code, it also reads The Underground. So to the Underground (basement) you go.
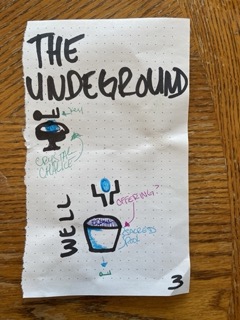
Once in the Underground, all you have to go by is your map. Being a seasoned adventurer, you notice the drawing of a key above a chalice and beside some kind of spiky creature. Proceeding with caution, you explore the Underground and discover a statue of Alduin, The World Eater, and beneath him are two more pieces of journal. You know you're close. A but more searching and you discover the Crystal Chalice which is holding some kind of magical ice sphere (aka frozen bath bomb).
The journal entry labeled "The Underground" shows the crystal chalice with a key above it, the label "The Well" and words "offering" and "sacred pool" written in. An arrow pointing to a green key is underneath the Sacred Pool. You take the frozen orb to the Well, which you locate using the map, and in the center of the room is the Sacred Pool filled with water. You make the offering and drop the frozen orb into the Sacred Pool. The water clouds and the orb vanishes, a gold key in its place.

Great! You take the key and the journal pages back upstairs. The key unlocks the padlock binding the scissors and then use the scissors to cut the twine. The green gem is yours, and just like the purple gem, there's a small token inside.
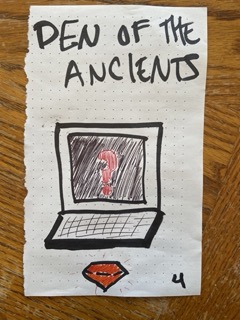
2 of the 3 gems found, it's on to the last gem. The Amber Gem. The only clue is the paper you found at the Alduin Statue labeled "Den of the Ancients." You enter the Den of the Ancients and find the Amber gem, locked away in a glass case by a 3 digit padlock, and a computer with this screen:

This reminds you of something you've seen before, something parked outside in the transport bay / garage. You find the vehicle in the transport bay, turn it on, and locate the missing frequency. Returning to the computer, you put in the radio frequency and it works! The screen changes and a song starts to play.

You name the tune, and you're granted access to the final 3 digit code.
You can see the full flow here:
The amber gem, like the others, has a secret inside. It's been a while, but you remember the journal and the last page of the journal, the one labeled The Vault. You arrange the gems as laid out on the page and slide those numbers into place on the padlock.
Congrats! You did it!
The lock pops off and the heavy ropes fall away. You remove the shiny paper and open The Vault:
Behind the Scenes Stuff
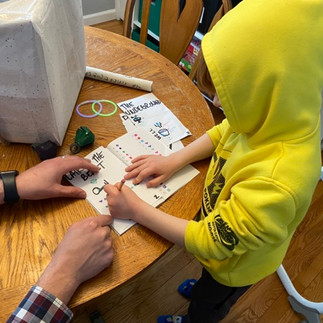
From start to finish, the hunt took about an hour to complete. The Hubs and Kiddo worked together - this was definitely not something The Kiddo could have done alone. Considering there were 2 Plushies in the vault, I designed it so The Hubs would also have to do some work to earn his reward.
In terms of planning, this took about 4-6 weeks of planning and prep. The Dollar Tree was an absolutely gold mine (I talk about that in Part 2) and all the materials, except the 3 digit number locks, was about $40. The 3 digit number locks were about $8 each, but thankfully they're reusable.
The maps were layouts of our house. Realm of the Unsleeping referred to The Kiddos room since he never sleeps. Lair of the Beast is the toddler's room because... well, that's definitely the toddler's vibe. Den of the Ancients was my and The Hubs room. The frozen orb was a bath bomb I made out of cornstarch and baking soda and froze in a mold (another Dollar Tree find) with the key inside. The 'Ancient Alphabet' is the Russian Cyrillic alphabet because I studied Russian in college for 2 years and that, oddly enough, continues to be super beneficial. The maps are made out a stiff canvas-like fabric I was practicing with while learning embroidery.
What Went Wrong
Something I try to teach my game dev students is that things are going to go wrong, to break, to not go the way you though. I definitely experienced this a few times.
The biggest was the Amber Gem and the computer codes. Instead of having a "name that tune" portion, I wanted to the computer to play a song that would convey directions to solve a directional lock. Going up in scale would be up, going down in scale would be down, eighth notes would be right and a rest would be left. Unfortunately, I couldn't find my directional lock and buying one would either have taken too long to ship or cost more than the rest of the budget combined. So I had to adapt on the fly and ended up with "What does the fox say" as an idea to keep it in the fox / Tunic theme.
Another idea I had was to create an alphabet code out of Legos but realized day of that I didn't have one of those big flat Lego platforms to build on, so there was really no way to create the puzzle. That's where the color-shape-letter code came in to save the day.
And that's it! I'm really proud of this hunt and it's definitely one of the more complex ones I've put together. Part of that is The Kiddo is older and can do more complicated things, but it's also flexing those creativity muscles, using digital and physical elements, building in redundancies (like the prize punch puzzle - it still worked even though the toddler destroyed it), and building in flexibility so order isn't mandatory but there's a very clear path forward and obvious end goal.
































Comments